Connect your ecommerce platform (e.g., Shopify, WooCommerce, ShipStation, etc.) to Badger’s system to automatically sync products, inventory, and orders for seamless inventory management and order fulfillment. Stores are integrated by Badger behind the scenes using Application Programming Interfaces (APIs).
During onboarding, store connection details are collected through the Onboarding Kickoff Form. After onboarding has been completed, additional stores can be connected by submitting the ‘Connect Store’ form located under the Operations section of the Help Center.
Integration Reference Guides
If you need assistance locating or obtaining the required information from your store, please review the guides below:
Shopify
-
Obtain your Site URL
Settings → Domains
Provide the URL containing ".myshopify.com"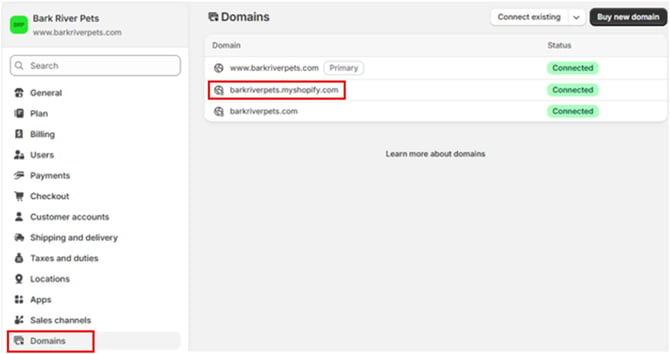
- Obtain Collaborator Request Code
Settings → Users → Security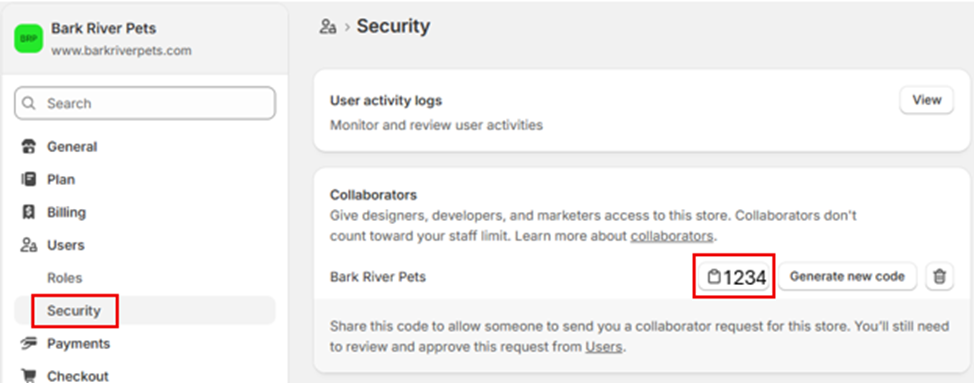
- Create a Badger Location.
Our system will share inventory to and pull orders from this Location.
Settings → Locations → Add location
Name: “Badger”, “Badger Fulfillment”, or “Badger Warehouse”
Address:
13 Dogs Way
Harvard, IL 60033
United States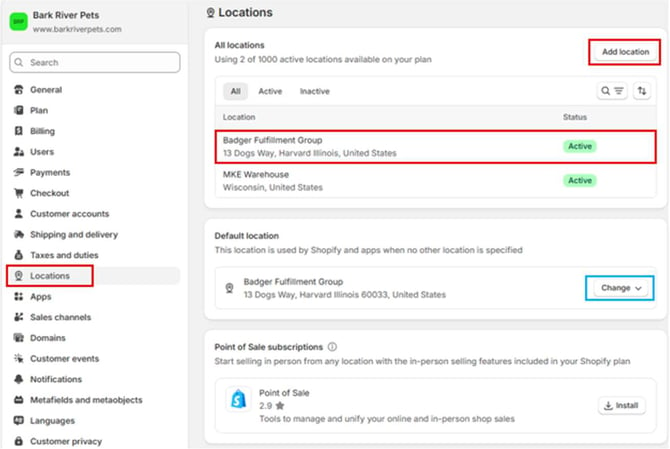
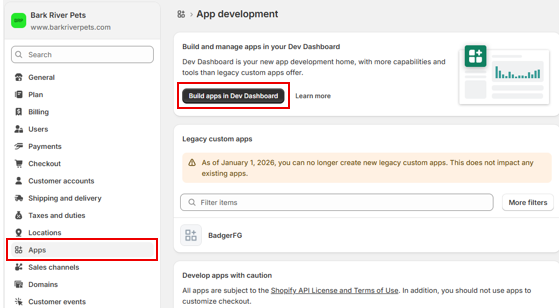
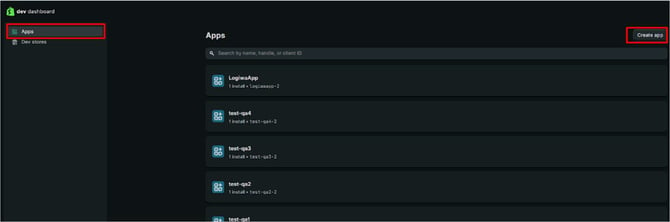
- Create the Badger App via your Dev Dashboard.
Settings → Apps → Develop apps → Build apps in Dev Dashboard
- Once in the Dev Dashboard, verify that Apps is selected in the left-hand navigation menu. Click the Create app button located in the top right corner.
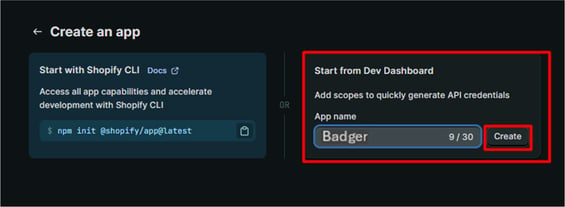
- In the Start from Dev Dashboard section on the right side, input “Badger” for the App name and then click Create.
- After the app is created, you must define permissions. You’ll be directed to the Versions tab. On this tab, scroll to the Access section. Locate the Scopes text box. Copy the following list of scopes and paste them into the box. Ensure they are comma-separated as shown:
write_orders, read_orders, read_products, write_products, read_product_listings, read_customers, write_customers, read_third_party_fulfillment_orders, write_third_party_fulfillment_orders, read_draft_orders, write_draft_orders, read_inventory, write_inventory, read_locations, read_fulfillments, write_fulfillments, read_shipping, write_shipping, read_merchant_managed_fulfillment_orders, write_merchant_managed_fulfillment_orders, read_assigned_fulfillment_orders, write_assigned_fulfillment_orders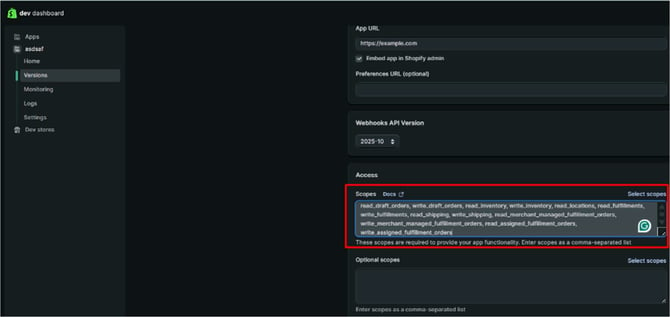
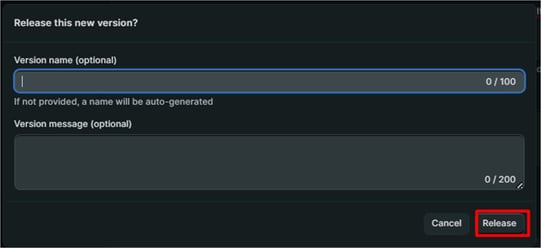
- Once the scopes are pasted, scroll to the very bottom of the page and click the Release button to save and apply these configurations.
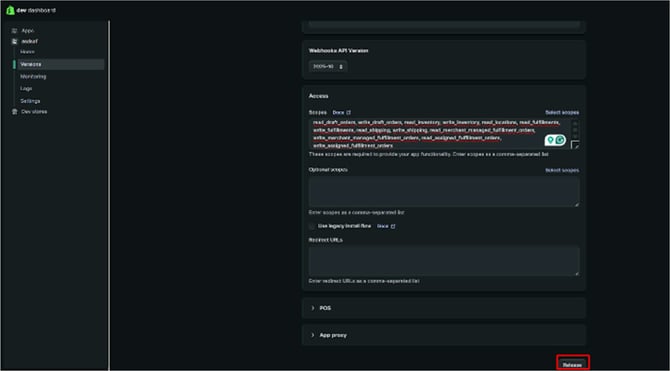
- A modal window titled Release this new version? will appear. You may enter a Version name or Version message, but this is not required. Click the Release button to confirm.
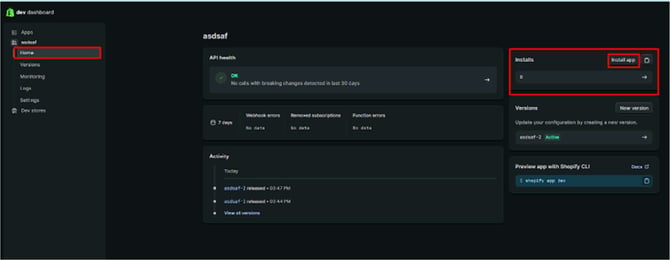
- Navigate back to the Home tab using the left-hand sidebar menu. Locate the Installs section on the right side of the dashboard and click the Install app button.
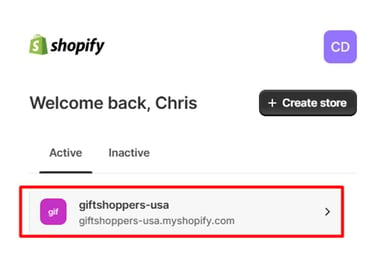
- You will be redirected to a Shopify login or store selection screen. Select the active store where you wish to install this integration.
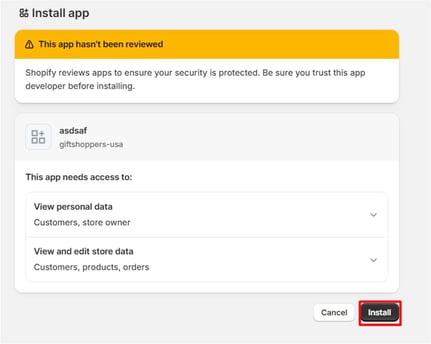
- On the Shopify installation screen, Click the Install button to proceed. This authorizes the app to interact with your store. NOTE: Since Custom Apps doesn’t require review process by Shopify, the warning below is displayed on Shopify. You can proceed to Install the App.
- Return to the Dev Dashboard and select the app. In the left-hand navigation menu, click on Settings. Retrieve Client ID and Secret.
In the Settings menu, locate the Credentials section. You will see your Client ID displayed. The Secret will be masked by asterisks (*). Click the eye icon (Reveal) next to the Secret field to make it visible. Keep this tab open, as you will need to copy these values and provide on the integration form.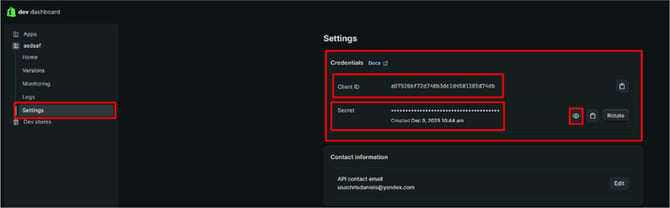
WooCommerce
The best and quickest way for Badger to connect to your WooCommerce store is to create an Administrator user account for the Badger specialist. This allows the specialist to log in and generate the required API key.
Example: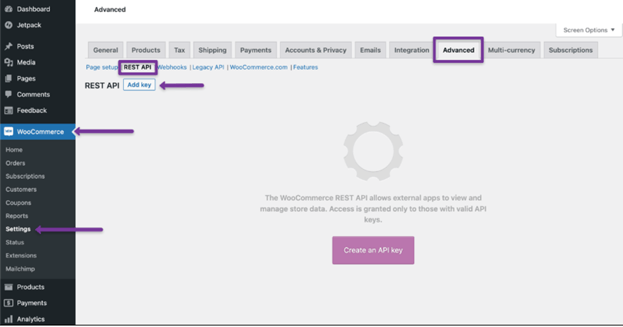
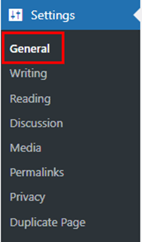
Site URL
Settings → General
![]()
Create Badger User
Under the ‘Users’ tab in the left-hand menu, create a new user account using the email address support@badgerfg.com. The password may be defined by the client; please provide the password to Badger once the account has been created. 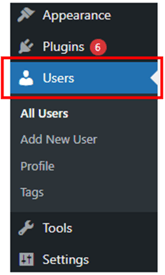
WooCommerce Badger User Credentials
Name: Badger
Username: BadgerFG
Password: Client defined (provide to Badger)
Email: support@badgerfg.com
Role: Administrator or Shop Manager
The Badger user account must be assigned either the Shop Manager or Administrator role. If the account does not have one of these permissions, the connection may appear successful during setup, but our WMS will be unable to download orders.

For safekeeping, copy and paste the Badger User-Account Credentials (username & password) into the message field at the bottom of the integration form.
Rest API
We will create a REST API key with ‘Read/Write’ permissions to ensure successful synchronization of products, inventory, and order information. No action is required from the client. You can reference this setup within your WooCommerce store settings:
Settings → Advanced → Rest API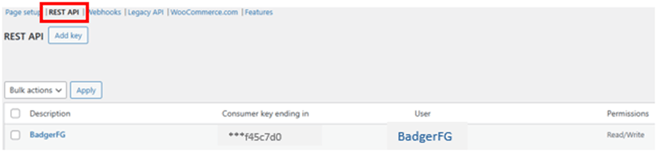
ShipStation
- Go to Settings

- Click on Account and continue with the API Settings

- You can find the API Key and API Secret

For safekeeping, copy and paste your ShipStation API Key and API Secret into the message field at the bottom of the integration form.