Contents
Shipment Order
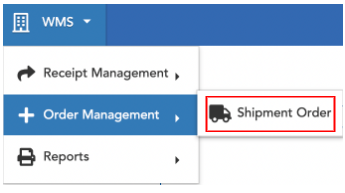
WMS -> Order Management -> Shipment Order
Create New Manual Order
A new manual order may be created using one of the following two methods:
- Shipment Order Screen
- Order Upload Excel Form (Preferred)*
If creating a single new manual Shipment Order, Option 1: Shipment Order Screen, may be used. Option 2: Order Upload Excel Form, is recommended when uploading multiple manual orders at once. The form can be used as a template to reduce redundant manual data entry, and also allows more time for editing and review [prior to upload], making it the preferred method.
Shipment Order Screen
WMS -> Order Management -> Shipment Order
Select New button (blue icon, upper left):
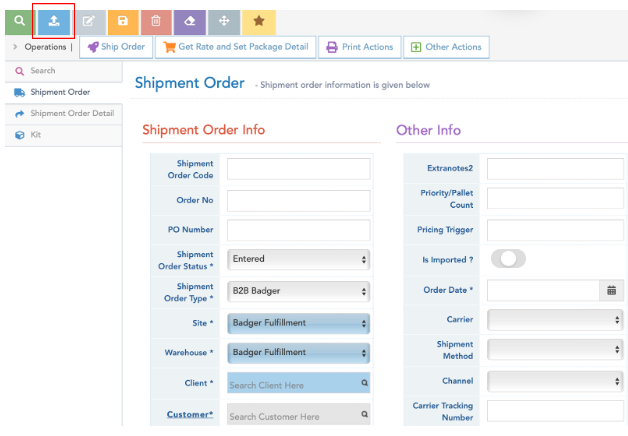
A new Shipment Order may be created with the following [minimum] info:
- Shipment Order Code
- Order No (optional)
- Client Name (pre-populated)
- Customer Info:
- Name
- Ship to Address
- Order Date
Additional fields may be specified if necessary (details below).
Fields Explained:
Shipment Order Code: Order code/number (automatically generated # for Shopify/store connections); customer PO # preferred for manual orders (alpha/numeric).
Order No: Order number (automatically generated Order # for store connections). May be the same as Shipment Order Code for manual entries; customer PO # preferred (alpha/numeric).
PO Number: Purchase order number (not required - used as additional reference # field if needed)
Shipment Order Status: Leave as Entered [default]
Shipment Order Type:
- B2C Badger: For [smaller] direct-to-consumer unit orders (general rule)
- B2B Badger: For [larger] whole case orders (general rule)
- Badger Expired: Allows allocation to expired product (for liquidation/disposal purposes) - use with caution*
Client: Badger Client Name (pre-populated)
To enter customer info, click the Customer* link; fill out all essential ship-to info (E-mail, Phone, Company Name optional), and hit OK:

The customer data entered above will populate in the below fields on the Shipment Order Info screen:

Order Date (required*): Order date should be set as date Shipment Order is entered/uploaded into Logiwa.
Carrier (optional): A specific ground carrier may be specified from the dropdown menu.
In order to properly specify a carrier, a Shipment Method field (below) must also be designated accordingly.
By default (if left empty), the cheapest, standard carrier option will be used. Only specify if necessary. Do not select other carriers not listed below.
| Logiwa Carrier Field |
| "EHub Carrier" (USPS) |
| "DHL eCommerce" (DHL/USPS) |
| "FedEx" |
Once an order is processed, the carrier used will populate in this field.
Note: in rare instances, specified carrier may not service address; next best option will be used.
Shipment Method (optional): A specific ground service shipment method may be specified (useful for express shipments i.e. “Standard Overnight”). By default (if left empty), the cheapest, standard shipping method is used. Only specify if necessary. Do not select other services not listed below.
In order to properly specify Shipment Method, Carrier field (above) must also be selected and must match to one of the below services.
| Carrier | Shipment Method (Logiwa Options) | Service Description |
| EHub Carrier | usps - Priority Mail | ~2-3 Day |
| FedEx | Fedex - 2 Day | 2 Day |
| FedEx | Fedex - Standard Overnight | Next Day |
Once an order is processed, the shipment method used will populate in this field.
Note: in rare instances, specified shipment method may not be available for address; next best option will be used.
Channel: Do not change/select
Carrier Tracking Number: After a shipping label is created, the carrier tracking number will populate in this field.
Actual Shipment Date: After the order is processed/”shipped” in Logiwa, the shipment date is populated in this field. Note: this date does not necessarily correspond to when a shipment is picked up or leaves the facility. Occasionally, ship date may update after or before an order physically leaves the warehouse according to billing process and fulfillment work-flow.
Carrier Markup Rate: After a shipping label is created, the shipping rate/price will populate in this field.

Once above info is filled out, hit the Save button (orange icon, upper left). Additional fields can be edited/specified after creating the shipment.
After hitting save, hit OK on the following pop-up window:

Enter the following Shipment Order Detail Info, and then hit the Save button (orange icon, upper left):
Item: Logiwa Product SKU or barcode
To enter a SKU in the Item* field, click in the text box, and enter an entire/or part of a SKU, item barcode, or item description and hit enter key. Do not use the Find (green button) to enter SKUs.

To return a dropdown list of all account-wide SKUs, click in the empty text box, and hit enter key. Scroll through the dropdown list and select the desired SKU.
Package Type: UNIT, CASE, or PALLET (IMPORTANT*); for whole-case orders, use CASE Package Type vs. UNIT. Package Type should match the type of package being handled/fulfilled.
Planned Package Quantity: Order Quantity (keep in mind what Package Type was selected when entering the correct order quantity*).
Do not fill out any additional fields (Lot No, Expiration Date, Location), as this will alter picking sequencing or prevent allocation.

After hitting Save, you will be prompted to enter an additional shipment order item (once the first item is added, the order is created and becomes active in the order queue). Repeat the previous steps or select Display Records (upper right) to view the list of Shipment Order Details (tab on left).
Note: Order items are allocated to inventory upon entry (when the Save button is selected). Once [successfully] allocated, order items may not be deleted, or order quantities may not be reduced.
From the Shipment Order Details list view, select New (blue icon, upper left) to enter an additional shipment item.
In the Shipment Order Detail tab, use the Display Records button (upper right) to toggle between the item list-view, and item detail info page.
Order Upload Form (Excel)
In the Shipment Order Screen, select Download Excel Template from the download/upload button (blue arrow icon, bottom left toolbar).

The Excel form contains columns to enter all essential Shipment Order info-fields described above (see Shipment Order Screen section).
Important*: Row 3 on the Excel Form includes linked fields that Logiwa references to pull in data upon import. Do not remove or modify fields in row 3.
Do not add/create new columns in upload form, as data may interfere with upload or may populate to erroneous fields within Logiwa.
Each order item will be entered on a separate row (starting on row 4).
Fields/columns marked in red on the form are mandatory to fill out.
Starting on row 4 in column 1, from left to right - fill out the following:
Shipment Order info
- Badger Client Name (constant)
- Order Code
- Order No
- PO Number
- Site: “Badger Fulfillment” (constant - may be hidden)
- Warehouse: “Badger Fulfillment” (constant - may be hidden)
- Order Type: B2C Badger or B2B Badger
- Channel: N/A (leave blank unless otherwise specified by Account Manager - may be hidden)
- Order Date
- Planned Ship Date (08/01/24 format)
Customer Ship-To Info
- Customer Name
- Customer Address ID
- Country
- Address Line 1-2
- City
- State
- Zip Code
- Email/Phone #
Shipment Details
- Carrier
- Shipment Method
Packing Notes
Any one-off packing notes should be brought to the attention of the account manager via customer portal ticket submission
Order Item Details
- SKU
- Package Type: UNIT, CASE or PALLET; if left blank, order pack type will upload as UNIT by default. If CASE type is desired, CASE must be specified.
- Ordered Quantity
To enter multiple order items for a single order, copy and paste all Shipment Order data to the next row - only different Item Details may be specified per row (i.e item SKU, package type, quantity). Repeat this step for all order items. Careful dragging excel row data to subsequent rows as Excel might auto increase numerical values (i.e. dates, addresses etc.).
Multiple Orders may be itemized on one order upload form. Repeat the previous steps on subsequent rows of the Excel form, for each order.
IMPORTANT: All fields in a column except for Item Details must contain the exact same data (verbatim), for a single order.
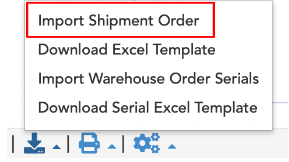
Once upload form is completely filled out, save file in .XLS format. In the Shipment Order Screen, select Import Shipment Order, and upload saved Excel form.
Important: once uploaded, please view/verify all order info and details in the Shipment Order screen for completeness and accurateness (instructions to view Shipment Order below).
For future order uploads, it is recommended to save a version of the Order Upload Template with the following fields filled out (on the first row). These fields will remain the same for every upload:
- Badger Client Name
- Site: “Badger Fulfillment”
- Warehouse: “Badger Fulfillment”
View/Edit Shipment Order
Note: once uploaded/synced or created, orders become active and in queue for order processing.
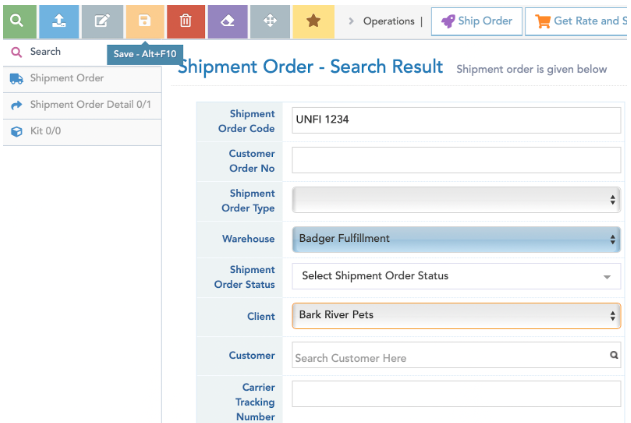
From the Shipment Order Screen, enter an existing Shipment Order Code or Order Number, and hit Search (green icon, upper left):
To search all Shipment Orders, enter just the Client name, and hit Search. Use other fields such as carrier tracking info, or Actual Shipment Date to search for a specific order.
On the next screen, select (click) the Shipment Order Code line item:

From the Shipment Order tab, you can view the general Shipment Order Info; to edit a field, first click the Edit button (gray icon, upper left), and then hit Save (orange icon, upper left), after making any changes. To delete an entire Shipment Order, select the Delete button (red icon, upper left). Note: to delete an entire Shipment Order, shipment order items must not have been allocated or processed. Instructions on deleting individual Shipment Order items below.
To attach a file directly in the Shipment Order (B2B), dropdown Other Actions (top toolbar), and select Upload Document. Attach the file in the file search window.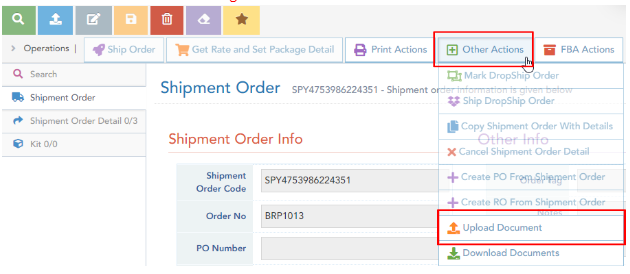
View order status on the Shipment Order Info page. Shipment Order Status shows the operational order status. An order status: Shipped, means the order has been completed. Use tracking number or freight BOL#/tracking, to view order transit/delivery status.

Shipment Details
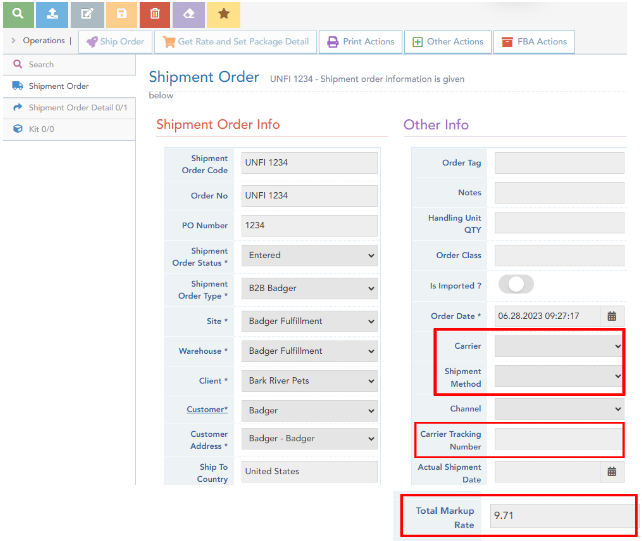
After a [ground] order is processed (shipping label created), the following information can be found in the Shipment Order screen:
- Carrier / Shipment Method
- Carrier Tracking Number
- Carrier Rate
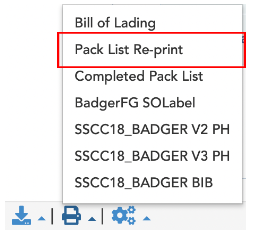
A packing list may be printed, only once a shipment is processed/marked “shipped” in Logiwa (this assures document accuracy in accordance to order processing). Select Pack List Re-print from the printer icon (icon, bottom left toolbar):
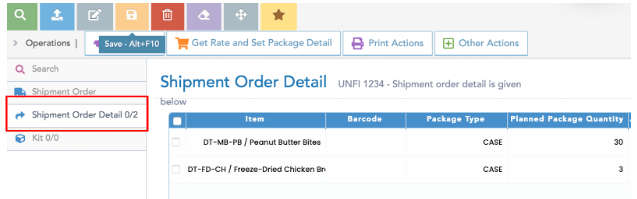
To view/edit the Shipment Order items, select the Shipment Order Detail tab on the left. Select a line item to view the item details:
Once in the item detail page, select the Edit button (gray icon, upper left), and then hit Save (orange icon, upper left), after making any changes. To delete a Shipment Order item, select the Delete button (red icon, upper left). Note: to delete a Shipment Order item, the item must not be allocated/processed.
Note: If order item is partially allocated, the customer can only reduce item quantity down to allocated quantity, or increase item quantity. These adjustments should only be made after obtaining approval from Account Manager. Once approved, remove or reduce any necessary quantities first, before adding or increasing any item quantities. Once a single item is added or increased in quantity, the order may allocate, and will need to be “reset” by the Account Manager for any further item-reductions.
To add a new shipment item select New (blue icon, upper left).
To enter a SKU in the Item* field, click in the text box, and enter an entire/or part of a SKU, item barcode, or item description and hit enter. Do not use the Find (green button) to enter SKUs.
To return a dropdown list of all account-wide SKUs, click in the empty text box, and hit enter key. Scroll through the dropdown list and select the desired SKU.
Be sure to select Save button (orange icon, upper left) after entering new item info.

In the Shipment Order Detail tab, use the Display Records button (upper right) to toggle between the item list-view, and item detail info page.
Kit Items
To view Shipment Order kit-items, select the Kit tab on the left. Kit-items can only be viewed/deleted from this tab. New kit-items/quantities must be entered as a new Shipment Order item by selecting the New button (blue icon, upper left). Once entered, kit-item components show up in the Shipment Order Detail tab. Deleting a kit SKU only removes the kit-item from the Kit tab; the kit components remain on the order in the Shipment Order Detail tab, and must be deleted separately.