Contents
Create a Receipt Order ("RO")
Navigate to Receipt Order screen.
WMS -> Receipt Management -> Receipt Order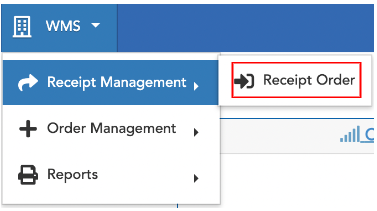
Select New button (blue icon, upper left):
Example Client: 'Bark River Pets'

Fill out the following info and then hit the Save button (orange icon, upper left):
Receipt Order: Customer defined
(example: “10.22.22-BarkRiverPets” or Purchase Order #)
Client: Badger client name (pre-populated)
Vendor: Badger client name
Receipt Date: Date receipt order created
*Do not change Status or Type fields.

Select OK on the following pop-up window:

Enter the following Receipt Order Detail Info, and then hit the Save button (orange icon, upper left):
*Be sure to hit Save after each entry
Item: Logiwa Product SKU or barcode
To enter a SKU in the Item* field, click in the text box, and enter an entire/or part of a SKU, item barcode, or item description and hit enter key. Do not use the Find (green button) to enter SKUs.

To return a dropdown list of all account-wide SKUs, click in the empty text box, and hit enter key. Scroll through the dropdown list and select the desired SKU.
Package Type: UNIT, CASE, or PALLET (Badger Stock Keeping Unit of Measure) - “UNIT” most common
Package Quantity: Total quantity to be received. This quantity should reflect the Package Type selected.
Expiration Date and Lot No. not required; these items will be filled out by Badger at time of receiving.

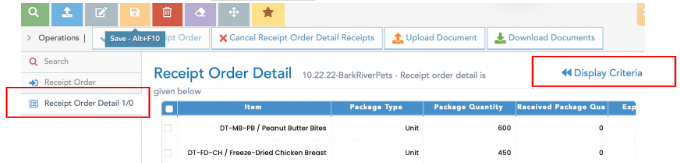
After hitting Save, you will be prompted to enter an additional receipt item (after adding the first item, the RO is created and saved in the system). Repeat the previous steps or select Display Records (upper right) to view the list of entered Receipt Order Details (tab on left).
From the Receipt Order Details list view, select New (blue icon, upper left) to enter an additional receipt item.
In the Receipt Order Detail tab, use the Display Criteria/Records button (upper right) to toggle between the item list-view, and item detail info page.
Edit a Receipt Order
Navigate to Receipt Order screen.
WMS -> Receipt Management -> Receipt Order
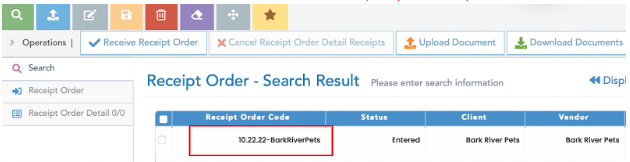
From the Receipt Order Search Screen, enter an existing Receipt Order Code, and hit Search (green icon, upper left):
To search all Receipt Orders, hit Search (leave Receipt Order Code field blank).

On the next screen, select (click) the Receipt Order Code line item:
From the Receipt Order tab, you can view the general Receipt Order Info; to edit a field, first click the Edit button (gray icon, upper left), and then hit Save (orange icon, upper left), after making any changes. To delete an entire Receipt Order, select the Delete button (red icon, upper left). Note: to delete an entire Receipt Order, receipt order items must not have been received. Do not edit Status or Type fields. Instructions on deleting individual receipt items below.

View Receipt Order Status
Once a receipt order is completed, the receipt order status will show: Completed; this means all receipt activities have been completed for the receipt order entered.

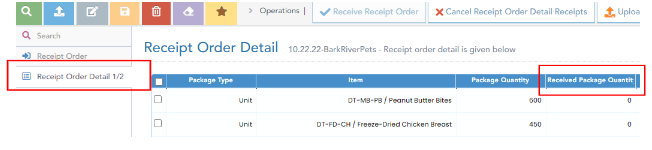
To view/edit the receipt items, select the Receipt Order Detail tab on the left. Select (click) a line item to view the receipt details:
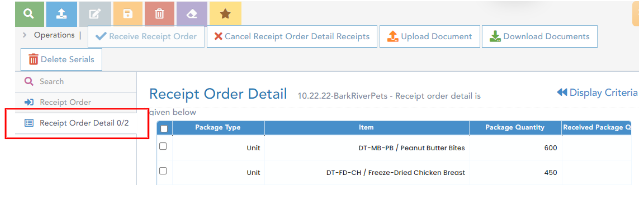
Once in the item detail page, select the Edit button (gray icon, upper left), and then hit Save (orange icon, upper left), after making any changes. To delete a receipt item, select the Delete button (red icon, upper left). Note: to delete a receipt item, the item must not have been received. Do not edit Other Information such as Lot No or Expiration Date field.

In the Receipt Order Detail tab, use the Display Records/Criteria button (upper right) to toggle between the item list-view, and item detail info page.
From the Receipt Order Details list view, select New (blue icon, upper left) to enter a new receipt item.
Once a receipt order is in process, or completed, Received Package Quantities will be reflected in the Receipt Order Detail list view. These quantities along with product attributes are best viewed in inventory reports or receipt reports.